Automation
Automation lets you build flows that automate your work end-to-end. Using a no-code builder, you design step-by-step flows that run when you need them — on events, on a schedule, or on demand. Each flow execution is logged step-by-step, and versioning keeps your changes safe and traceable.
Key Features
No-Code Flow Builder
Create flows as a series of steps in a visual builder — no code required. Define what happens at each step, connect actions, and orchestrate your processes without writing scripts or deploying custom logic.
Three Ways to Trigger Flows
1. Event-based trigger
The flow runs automatically whenever a specific event occurs in the system. Use this to react to data changes, user actions, or other events in real time.
2. Time-based trigger
The flow runs on a schedule — daily, weekly, or any recurring interval you choose. Use this for periodic tasks like reports, cleanup, or sync jobs.
3. Manual trigger
Run the flow on demand from the UI or via an API. Use this for one-off runs, testing, or when you want full control over when the flow executes.
Flow Versioning
Flows support versioning so you can iterate safely and roll back when needed.
- Safe updates — Edit and test new versions without affecting the live flow until you publish.
- Rollback — Revert to a previous version quickly if something goes wrong.
- Audit trail — See who changed what and when, so changes are traceable.
- Controlled rollout — Promote a version to production only after you’re satisfied with testing.
Execution Logging
See exactly how each run behaved, step by step.
- View the full history of flow runs.
- Inspect each step: inputs, outputs, duration, and status (success or failure).
- Debug failed runs by seeing which step failed and why.
- Use logs to verify behavior and troubleshoot issues.
Metrics (Coming Soon)
Get a clear picture of how flows perform over time.
- Entry and exit rates — See what percentage of runs enter and exit each step.
- Funnel-style reports — Identify where runs drop off or get stuck.
- Performance insights — Use detailed reports to optimize flows and improve reliability.
Getting Started
This guide will help you build and run your first flows:
Create Your First Flow
-
Open the Automation app from your dashboard.
-
Go to the Flows section, then click the + (plus) or Add button.
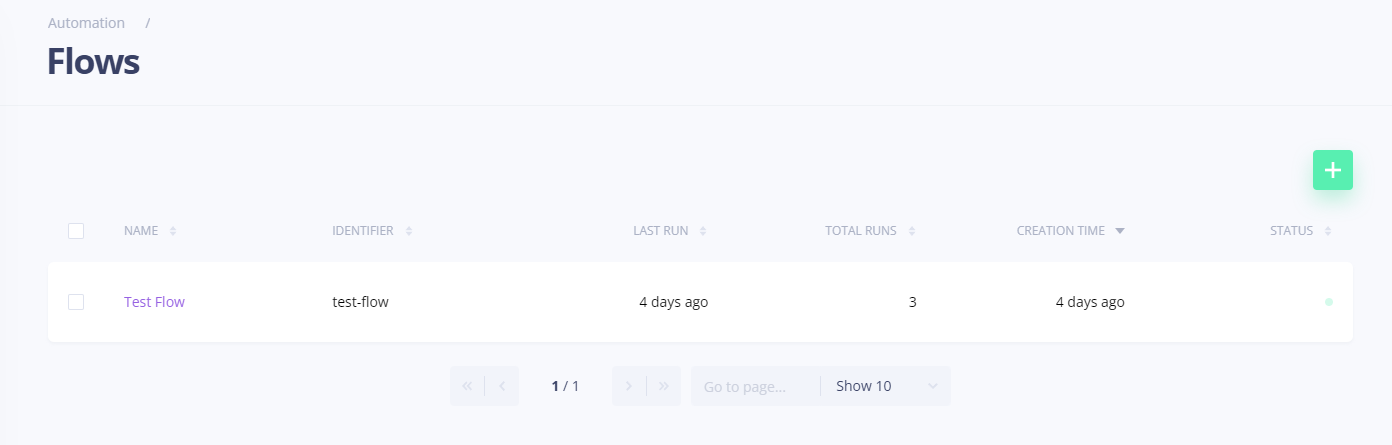
-
A dialog appears where you can enter:
- Name — A human-readable label for the flow (e.g. "Send welcome email", "Daily report"). Use this to find and recognize the flow in the UI.
- Identifier — A unique, machine-friendly key used to run the flow from your code or API (e.g.
send-welcome-email,daily-report). Pick something stable; the identifier is what you'll use when triggering the flow programmatically.

-
Click Continue Editing to create your flow.
-
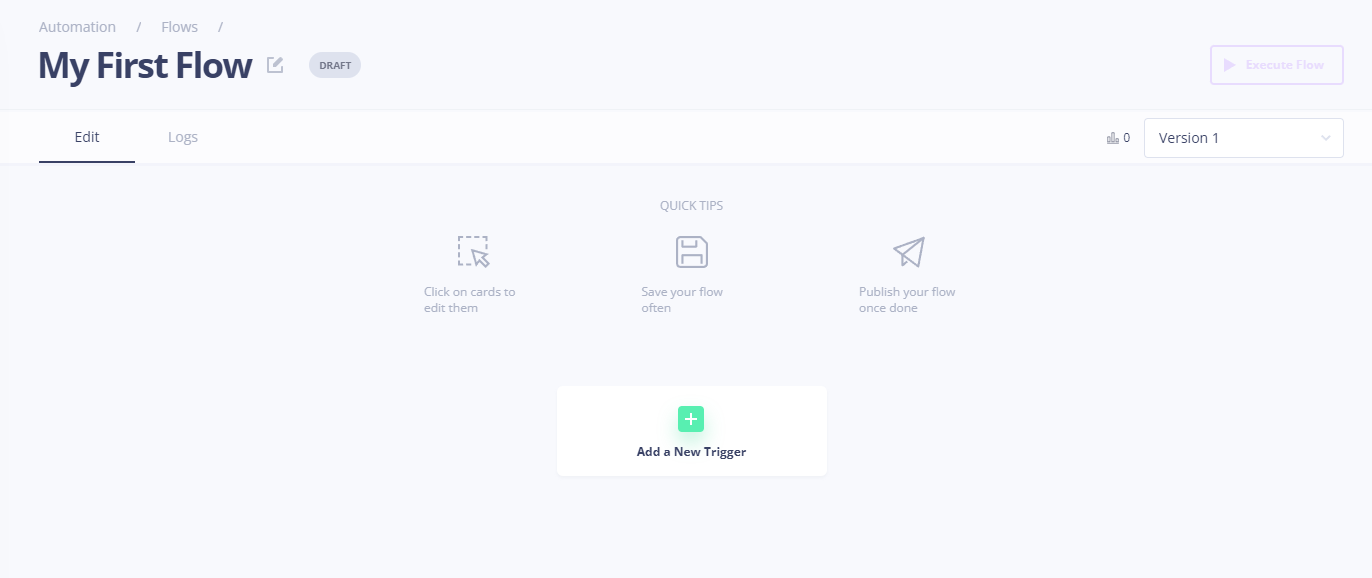
Once the flow is created, you are presented with the Flow Editor, where you can begin creating a new trigger and adding steps to your flow.
Configure Triggers
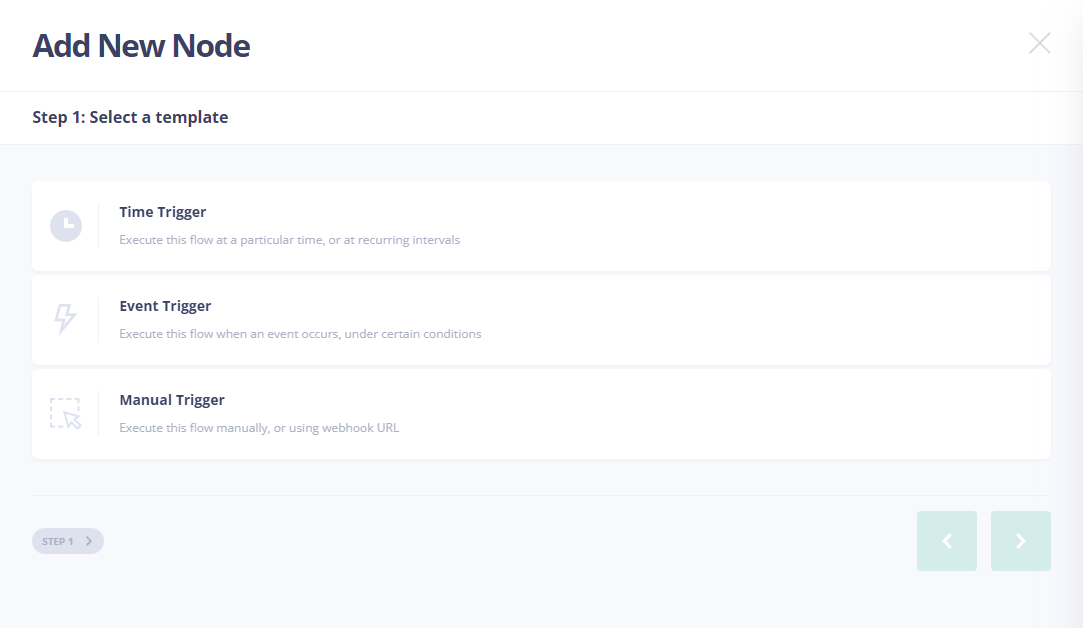
Every flow needs at least one trigger to run. You can choose from three trigger types:
- Event-based — The flow runs automatically when a specific event occurs in the system.
- Time-based — The flow runs on a recurring schedule (e.g. daily, weekly, or a custom interval).
- Manual — The flow runs when you trigger it from the UI or via the API.
In the Flow Editor, add a trigger by selecting one of these options:
Event-based trigger
Use an event-based trigger when you want the flow to run in response to something that happens in your system — for example, when a record is created, updated, or when a user performs an action. Configure which event (and optionally which source or filters) should start the flow.
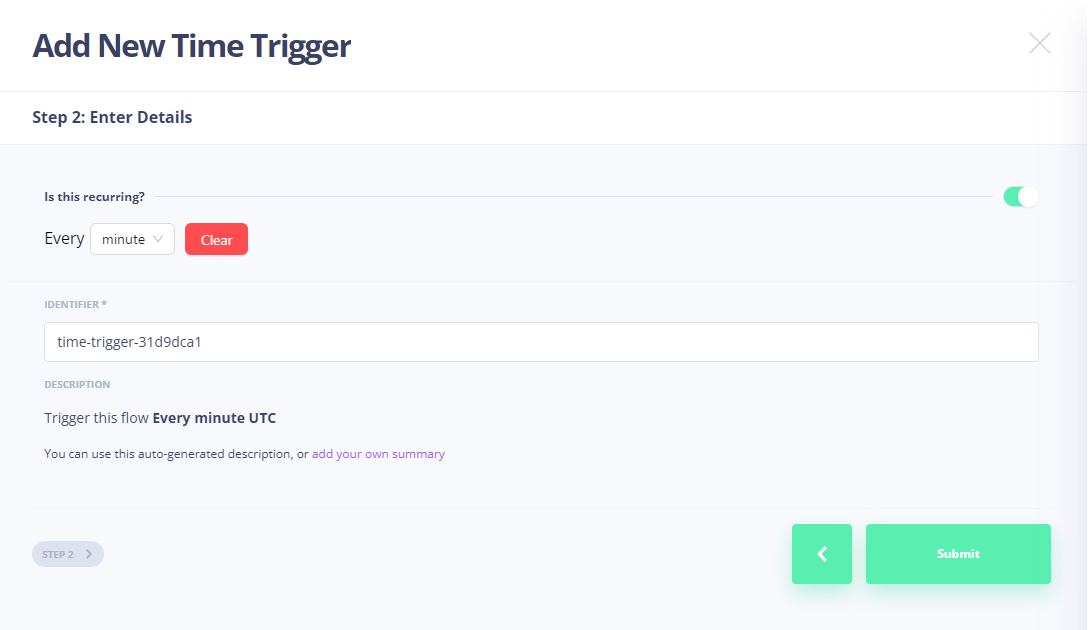
Time-based trigger
Use a time-based trigger when you want the flow to run on a schedule. Set the recurrence (e.g. every day at 9 AM, every Monday, or a custom cron-like schedule) and the flow will run automatically at those times.
Manual trigger
Use a manual trigger when you want to run the flow on demand. You can start it from the Flow Editor with a button click, or invoke it programmatically using the flow identifier via the API. No event or schedule is required.
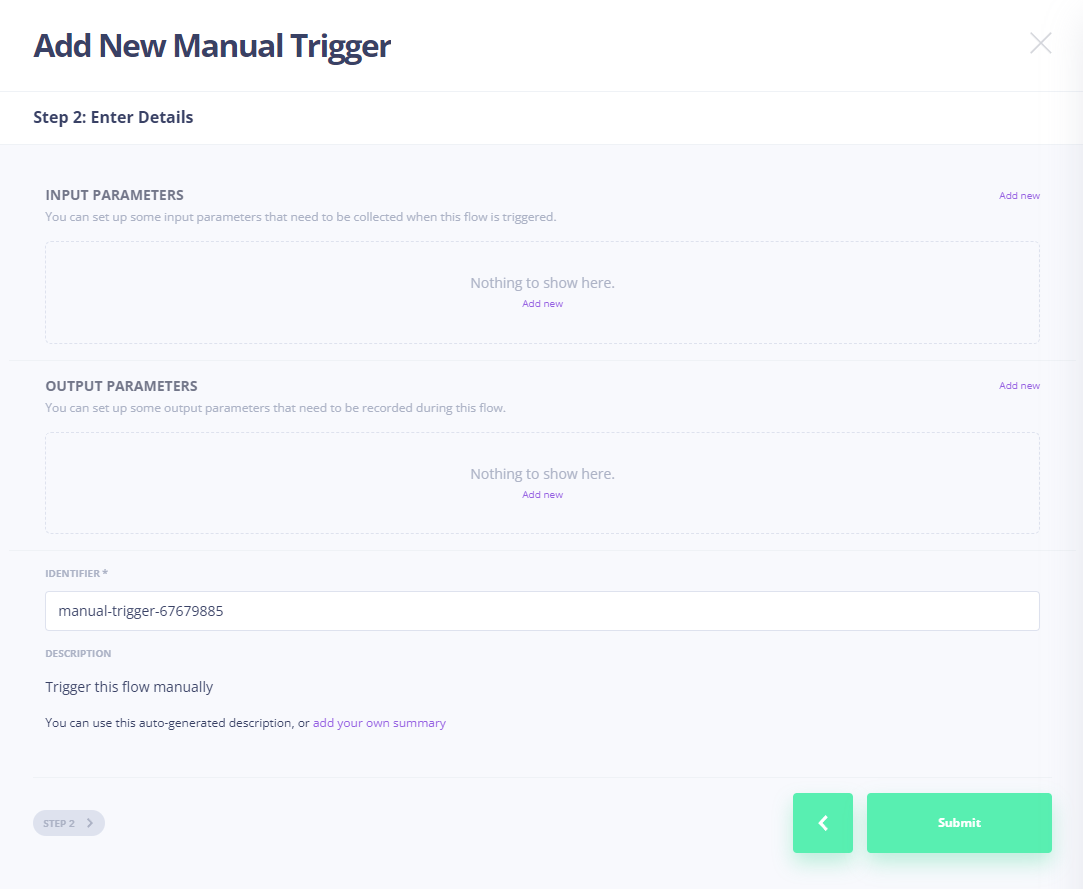
Manual triggers support input parameters and output parameters. These define what data the flow accepts when it runs and what it can return. Each parameter has a data type — for example, String, Boolean, Int, or file types like Spreadsheet. You can use any of the data types available in DashX for your parameters.
- Input parameters are all the inputs the flow needs to run. You can add as many as you need. For instance, you might add a file parameter of type Spreadsheet so the flow can accept a CSV, plus other parameters (e.g. a String for a job name, or a Boolean for options) that the flow uses in its steps.
- Output parameters define what the flow returns when it finishes. You configure their names and data types so that callers (or downstream steps) receive structured results.
Give triggers and steps clear, consistent identifiers. These names drive auto-complete in later steps — when you reference data from an earlier step (for example, a manual trigger’s input parameters), you’ll select by trigger identifier and parameter identifier. The identifiers must match exactly. Use one convention throughout: if you use hyphens, use hyphens everywhere; underscores are recommended (e.g. webinar_registrants, campaign_name).
Example: Upload a CSV of webinar registrants to add them to a campaign
Suppose you have a flow that takes a CSV of webinar registrants (name, email, company) and adds each person to a marketing campaign — for example, enrolling them in a follow-up email sequence or adding them to a list in your marketing tool. The manual trigger’s input parameters might include:
- A file parameter of type Spreadsheet for the CSV upload.
- Campaign name (String) — which campaign or email sequence to enroll registrants in (e.g. "Webinar Follow-up Q1").
- Event name (String) — the webinar or event name, used for tagging and reporting (e.g. "Product Launch 2024").
- Send welcome email (Boolean) — whether to send an immediate welcome email when they’re added, or only add them to the sequence.
When you run the flow (for instance, after exporting registrants from your webinar platform), you upload the CSV and provide the campaign name, event name, and the welcome-email option. The flow then uses the file and these parameters in its steps to add each row to the right campaign and apply the chosen behavior.
Add Steps
After configuring a trigger, you build the flow by adding steps. Each step has a type and can reference outputs from the trigger or from previous steps (using their identifiers in auto-complete). The available step types are:
- Time step — Pause or delay execution for a set duration or until a specific time.
- Event step — Wait for or react to an event before continuing.
- Action step — Perform an operation (e.g. call an API, transform data, send a message).
- Branch step — Split the flow based on a condition (if/else) so different paths run depending on the result.
- Iterator start step — Start a loop over a list or collection; subsequent steps run once per item until an iterator end step.
- Output step — Define or pass values to the flow’s output parameters (for example, to return data from a manual trigger flow).
- Exit step — End the flow or the current branch immediately (optionally with a status or result).
Time step
A Time step pauses the flow for a period or until a specific time. It has two behaviors:
Wait for — Wait for a fixed duration. For example, you can wait for 2 hours between steps. The duration is fully customizable. Supported units are seconds, milliseconds, minutes, hours, days, weeks, months, and years. The wait runs in-flight: the flow execution pauses for that duration and then continues to the next step.
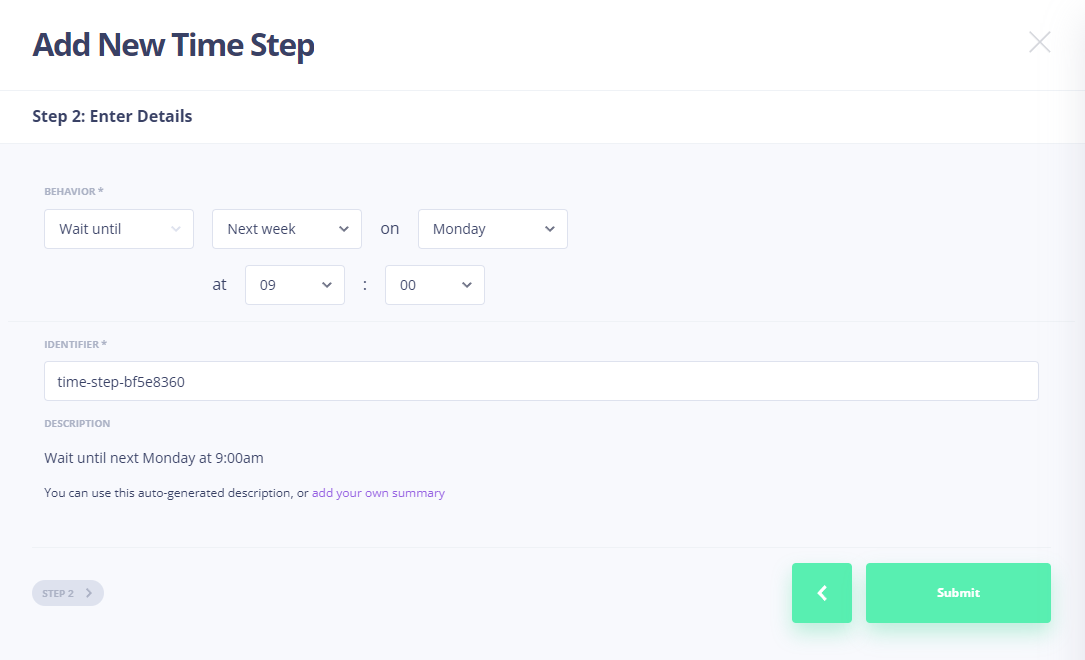
Wait until — Wait until a specific time (the next occurrence of that time). Options:
- Next hour — Choose the minute when execution should resume (e.g. the 0th, 15th, or 35th minute of the next hour).
- Next day — Choose the hour and minute (e.g. next day at 9:30 AM).
- Next week — Choose the day of the week (Monday through Sunday), plus the hour and minute.
- Next month — Choose the day of the month (e.g. the 5th), plus the hour and minute (e.g. next month on the 5th at 10:45 AM).
Event step
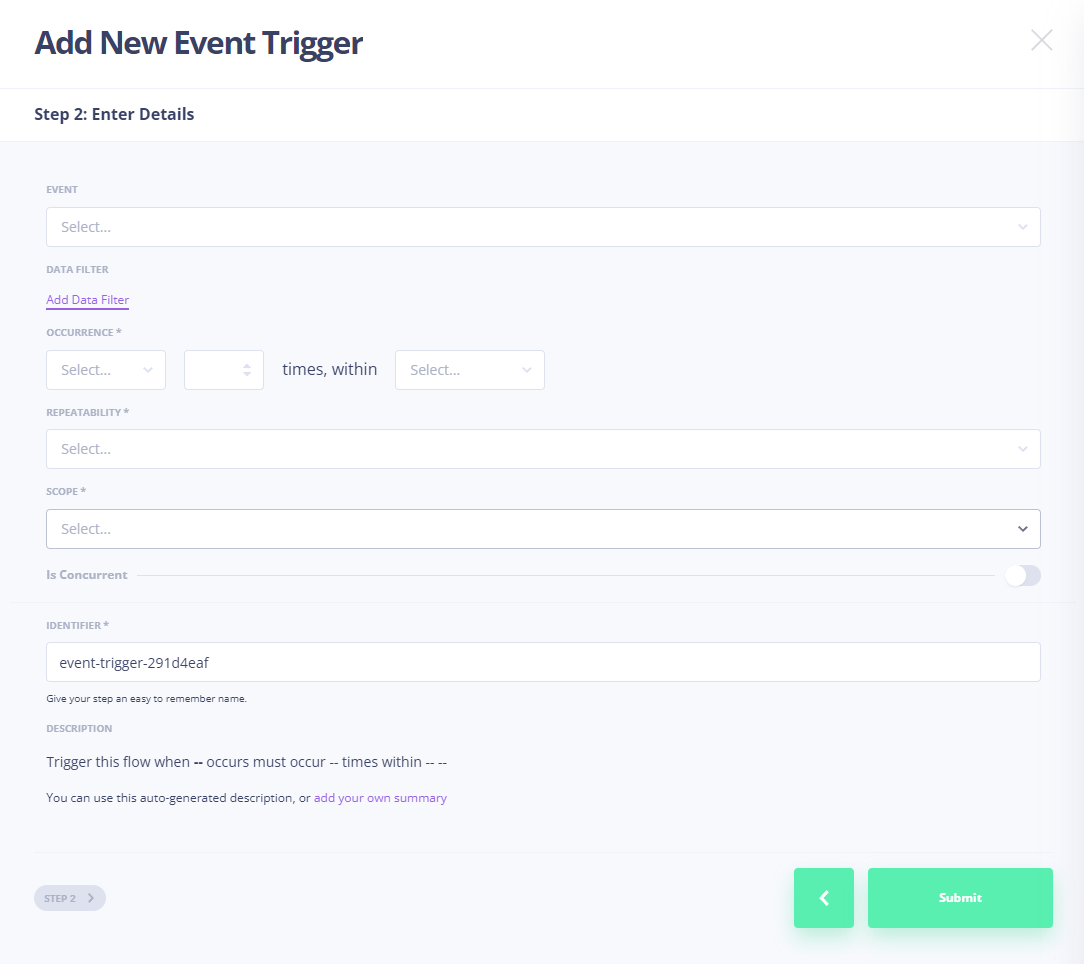
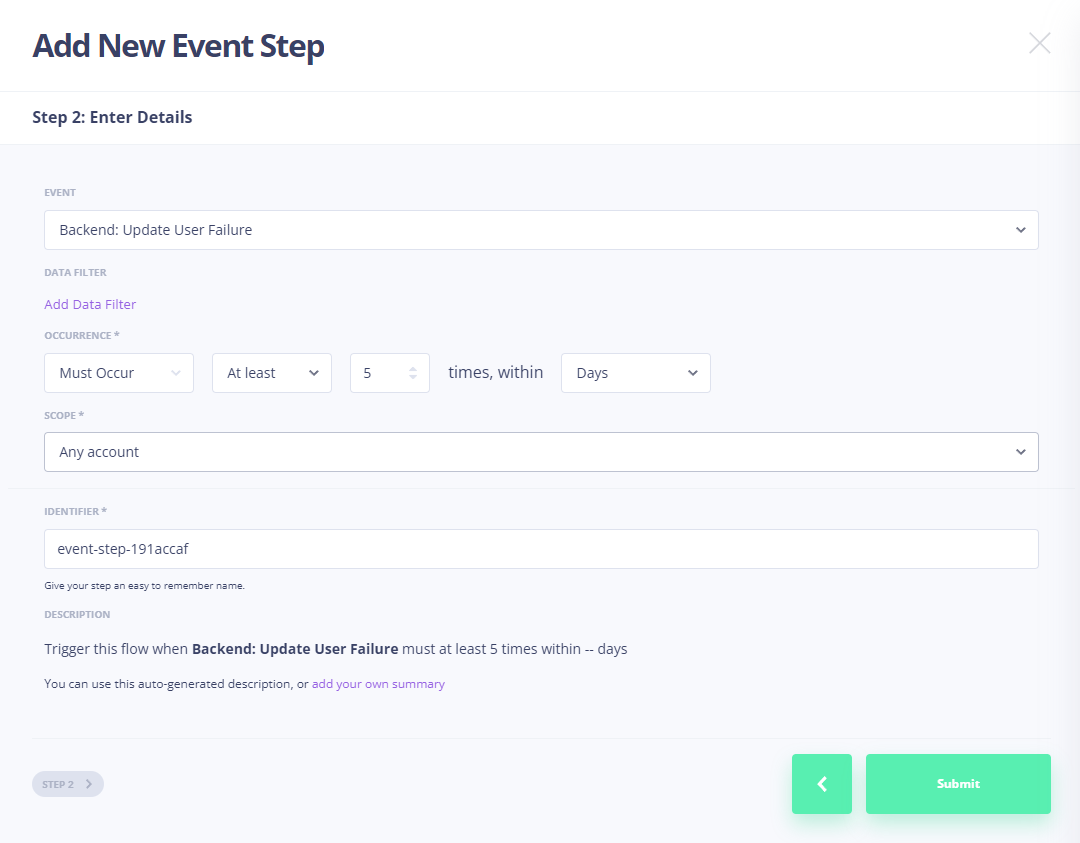
An Event step waits for (or reacts to) an event before the flow continues. You choose an event type — for example, "Page viewed" — and then optionally add a data filter to narrow when the step completes.
Data filter — Constrain which events count. For example, for "Page viewed" you might add a filter such as: the path property equals /thank-you, and this must occur at least one time. Only events that match the filter (and the occurrence rule) will satisfy the step.
Scope — You can scope the event in two ways:
- For this account — The step is tied to a specific user/account. Execution is tracked per user and the event is only considered when it’s performed by that account. This behaves like a user journey: "wait until this user does X."
- Any account — The step is not tied to a user. The event can be triggered by any account. Use this for system-level flows where you only care that the event happened somewhere (e.g. "wait until someone completes a thank-you page view").
Occurrence — You always define how often the event must (or must not) happen within a time window:
- Must occur — The event must happen a certain number of times within the duration. You then choose:
- Exactly — The event must occur an exact number of times (e.g. exactly 2 times).
- At least — The event must occur at least a minimum number of times (e.g. at least 1 time).
- Must not occur — The negation of "must occur": the event must not happen the specified number of times within the duration. You again choose exactly or at least. For example: "this event must not occur 1 time within the next 4 hours" — if the user does not perform the event in that window, the step completes and you can continue the flow (e.g. send an email to an admin or take another action).
For both "must occur" and "must not occur," you specify a duration. This duration is the time bound (time limit) for the event step: the flow evaluates whether the occurrence condition is met within that window.
Action step
An Action step runs an operation inside DashX. You pick the operation to run — for example, Create Broadcast or Execute Code or Invoke AI agent — and then you fill in the parameters that the operation needs.
Every parameter value is an expression. DashX uses Handlebars for these expressions, so you can insert variables and logic. Outputs from the trigger and from previous steps are available as variables: you reference them by the step’s identifier and the output or parameter name (e.g. from a manual trigger’s input parameters).
Handlebars quick reference
| Syntax | Meaning |
|---|---|
{{path.to.value}} | Output a variable (HTML-escaped). Use the identifier of the trigger/step and the property name. |
{{{path.to.value}}} | Output a variable unescaped (raw HTML). |
{{#if value}}...{{/if}} | Conditional block. |
{{#each list}}...{{/each}} | Loop over a list. |
Examples in a flow
{{manual_trigger.campaign_name}}— Value of the campaign_name input parameter from the manual trigger (assuming the trigger identifier ismanual_trigger).{{manual_trigger.event_name}}— Value of the event_name input parameter.{{send_email.to}}— Output to from a previous step whose identifier issend_email.
Use the same identifiers you gave your triggers and steps; they must match exactly for auto-complete and for expressions to resolve correctly.
View Logs and Debug Runs
Documentation coming soon.